This blog post is part 2 of my series on how to decrypt HTTPS traffic on your own network.
This time you will learn how to create an intermediate Certificate Authority that will be able to issue its own certificates. This will come in handy when we begin to use this intermediate CA with the powerful MITMProxy. MITMProxy will generate its own CA every time it launches if there isn’t one already in its configuration directory (~/.mitmproxy by default). Although we could use the default CA files, it’s useful to know what format the files are in, and if you have already distributed the root CA we generated in the last blog post to your devices, decrypting HTTPS traffic from your devices won’t require you to install a new CA certificate on each device.
This blog post is part 2 of my series on how to decrypt HTTPS traffic on your own network. Part 1 is available here.
Why an Intermediate CA?
As stated in Cloudflare’s PKI blog post, an intermediate CA is useful because,
It allows the root certificate’s private key to be kept offline and only used for signing intermediate certificates. Intermediate CA certificates can be shorter lived and be used to sign endpoint certificates on demand. Shorter-lived online intermediates are easier to manage and revoke if compromised.
Although we could use the root CA directly with MITMProxy, the intermediate CA will give us a little more freedom in case we need to reissue the certificate. Because the root CA is already installed, and the intermediate certificate is signed by the root CA, a newly issued intermediate CA will be inherently trusted by the device because it will be able to verify the trust chain back to the root CA. If you had to reissue the root CA, you would have to install it again to each device, which can take quite a while if you have more than a handful of devices.
The Intermediate CA Certificate and Key
Preparing the Configuration Files
$ mkdir ~/certificate-authority/intermediate-ca
$ cd ~/certificate-authority/intermediate-ca
$ touch config.json intermediate-csr.json
Now open config.json and intermediate-csr.json in your favorite text editor, and use the following content:
{
    "signing": {
        "default": {
            "expiry": "8760h"
        },
        "profiles": {
            "intermediate": {
                "usages": [
                    "signing",
                    "key encipherment",
                    "cert sign",
                    "crl sign"
                ],
                "expiry": "8760h",
                "is_ca": true
            }
        }
    }
}{
"CN": "Your MITM CA",
"hosts": [
""
],
"key": {
"algo": "rsa",
"size": 4096
},
"names": [
{
"C": "US",
"ST": "Your State",
"L": "Your City",
"O": "Your Organization",
"OU": "MITMProxy"
}
]
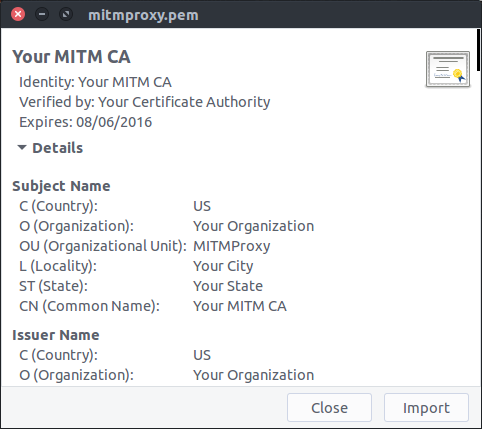
}We opted for calling this intermediate CA “Your MITM CA” since we will utilize it using MITMProxy. Note also that the expiry time for the intermediate CA is set to 8760h or 365 days.
Generating the Certificate and Key
Now you can create the intermediate CA using CF-SSL, using the same root CA certificate and keys we made in the previous blog post.
$ cfssl gencert -ca ../ca.pem -ca-key ../ca-key.pem \
-config="config.json" -profile="intermediate" \
intermediate-csr.json | cfssljson -bare mitmproxy

[INFO] generate received request
[INFO] received CSR
[INFO] generating key: rsa-4096
[INFO] encoded CSR
[INFO] signed certificate with serial number 2664568087458208209
As with the previous blog post, we can inspect the generated certificate using gcr-viewer.

We can also inspect the certificate using openssl
$ openssl x509 -in ca.pem -text -noout
Certificate:
    Data:
        Version: 3 (0x2)
        Serial Number: 2664568087458208209 (0x24fa728edcc9d9d1)
    Signature Algorithm: sha512WithRSAEncryption
        Issuer: C=US, O=Your Organization, OU=Your Certificate Authority, L=Your City, ST=Your State, CN=Your Certificate Authority
        Validity
            Not Before: Aug  7 02:53:00 2015 GMT
            Not After : Aug  6 02:53:00 2016 GMT
        Subject: C=US, O=Your Organization, OU=MITMProxy, L=Your City, ST=Your State, CN=Your MITM CA
        Subject Public Key Info:
            Public Key Algorithm: rsaEncryption
                Public-Key: (4096 bit)
...
        X509v3 extensions:
            X509v3 Key Usage: critical
                Digital Signature, Key Encipherment, Certificate Sign, CRL Sign
            X509v3 Basic Constraints: critical
                CA:TRUE, pathlen:1
            X509v3 Subject Key Identifier:
                6D:4C:56:9A:AB:8F:B4:0D:99:B3:DB:4E:66:9B:B9:F6:D6:05:F9:92
            X509v3 Authority Key Identifier:
                keyid:D4:B4:07:B9:AF:BC:28:E6:0D:B3:0F:33:2F:69:88:51:2F:27:3E:69
Note that although this certificate is still a valid CA certificate, the Max Path Length has decreased by 1 compared to the root certificate we created previously. (Max Path Length: 1 in the gcr-viewer screenshot, pathlen:1 in the openssl output)
Preparing the CA and Key for Use with MIMTProxy
Now that we have a valid Intermediate CA certificate and key we need to rename them and generate a PKCS #12 version of them. We also have to bundle the certificate and key into a single PEM file.
Once all the files are renamed and output in a format that MITMProxy can use, we will create a tarball that will make allow us to easily use the files in MITMProxy
$ mkdir ~/certificate-authority/intermediate-ca/mitmproxy
$ cd ~/certificate-authority/intermediate-ca/mitmproxy
$ cp ../mitmproxy.pem mitmproxy-ca-cert.pem
$ cp ../mitmproxy-key.pem mitmproxy-ca-key.pem
$ touch mitmproxy-ca.pem
$ cat mitmproxy-ca-key.pem >> mitmproxy-ca.pem
$ cat mitmproxy-ca-cert.pem >> mitmproxy-ca.pem
$ ln -s mitmproxy-ca-cert.pem mitmproxy-ca-cert.cer
$ openssl pkcs12 -export -out mitmproxy-ca-cert.p12 -inkey mitmproxy-ca-key.pem -in mitmproxy-ca-cert.pem -password pass:
$ tar czvf ../mitmproxy.tgz *

## Now we can see the files that got created and compressed into the tarball

$ tar tzf ../mitmproxy.tgz
mitmproxy-ca-cert.cer
mitmproxy-ca-cert.p12
mitmproxy-ca-cert.pem
mitmproxy-ca-key.pem
mitmproxy-ca.pem
Warning!
As with the last blog post, this time we generated a private key that is NOT protected with a password. Not only that, we have three copies of the private key in two different formats. If any person were to get a copy of the key they would also be able to generate certificates that your devices would trust, in addition to being able to decrypt traffic encrypted by the private key. Be extra careful with who has access to the files.
Next Steps
Now that we have our certificates and keys in the tarball, we’re ready to use our brand new Intermediate CA to decrypt HTTPS on one of your devices! That’s the topic for the next blog post, stay tuned!